Creating a website might seem daunting, especially if you're new to the digital landscape. Fortunately, Webflow offers a user-friendly platform that combines the nuances of design with powerful functionality, making it accessible even to beginners. In this guide, we will walk you through each phase of building a website using Webflow—from the initial planning and layout to the regular maintenance and updates required to keep your site at peak performance. Whether you're looking to craft a personal blog, a business portfolio, or an e-commerce site, this step-by-step guide ensures you have all the tools and knowledge needed to create a dynamic and engaging online presence.
Step 1: Planning and Setup
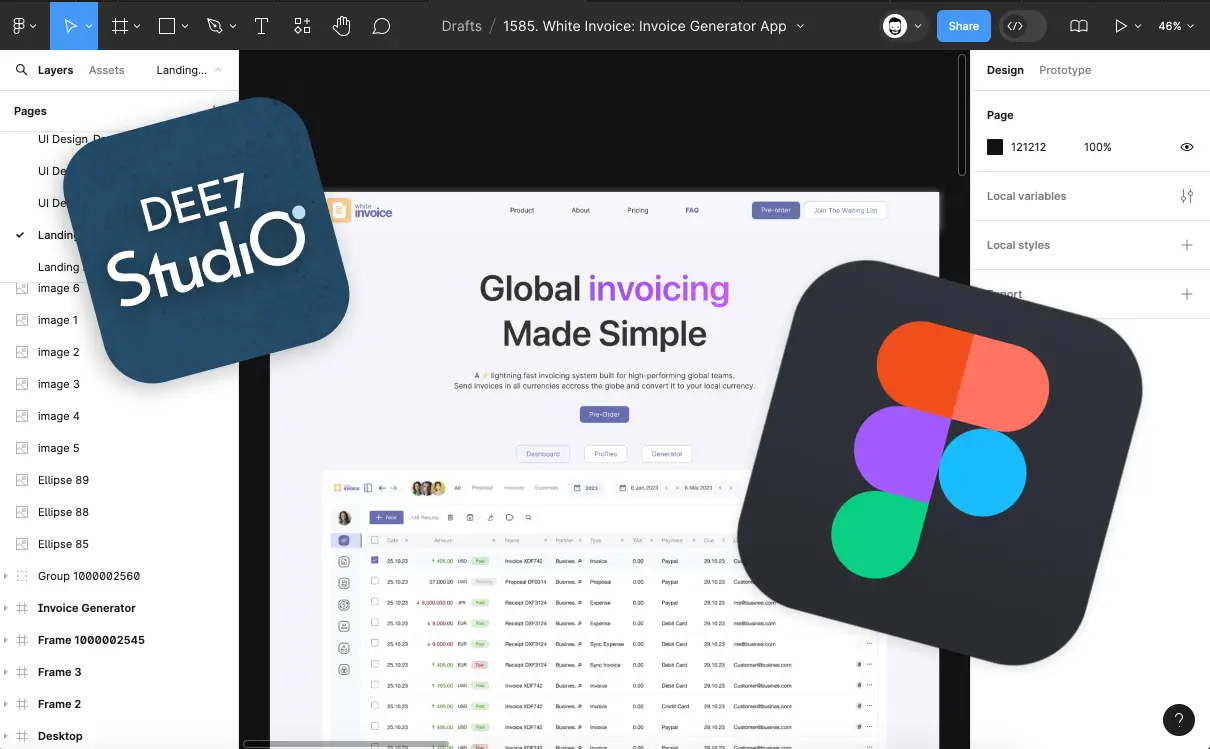
Before diving into Webflow to build your website, starting with a detailed plan and design in Figma is a strategic move. Figma allows you to visualize the site structure and design elements interactively and collaboratively before development begins. This process ensures that all stakeholders agree on the layout, functionality, and aesthetic of the website, minimizing revisions and miscommunications during the development phase. By having a complete design ready with all visual assets and content organized, you streamline the workflow in Webflow. It prevents back-and-forth adjustments and enables you to focus on accurately translating your design vision into reality. Moreover, Figma helps to map out user experience paths, ensuring that the site’s navigation is intuitive and effective right from the start. This proactive approach saves time, reduces costs, and significantly improves the quality of the final product.
1. Define the Site Structure
Understand the Goal
Start by understanding the purpose of your website.
Is it to inform, sell, showcase, or educate?
Sketch a Sitemap
Draw a basic layout of your site’s pages and how they connect.
Include main categories and subcategories.
Consider User Flow
Think about how users will navigate from one page to another.
Ensure the flow is logical and enhances user experience.
2. Gather Content and Assets
Content Collection
Compile all necessary text content—like blog posts, product descriptions, and informational pages.
Ensure it’s ready to be uploaded.
Asset Accumulation
Gather all visual elements like logos, images, icons, and videos.
Ensure they are high quality and relevant.
Organize Efficiently
Use folders to organize your content and assets by page or category, making them easy to access during the design phase.
3. Set Up Your Webflow Account
Sign Up
Go to Webflow.com and sign up for an account.
Choose a plan that suits your needs based on the size and complexity of your website.
Familiarize Yourself with the Interface
Spend some time exploring the Webflow interface.
Watch introductory tutorials available on Webflow University or YouTube.
Create a New Project
Start a new project from scratch or use a template to get a head start.
If you want us to design, build or rebuild your website, please book a meeting and place your order now.
Step 2: Start with the Basics
Setting up your workspace properly in Webflow is foundational for maintaining consistency and efficiency throughout the development of your website. By creating and defining global components like the navigation and footer, you ensure that your website maintains a consistent look and feel across all pages. This not only streamlines the development process but also simplifies future updates to the site. Implementing global styles for typography, colors, and classes right from the beginning establishes a cohesive visual language and speeds up the page-building process. It eliminates repetitive styling tasks for each new element, allowing you to focus more on perfecting the user experience and less on adjusting individual components. Proper initial setup in Webflow ensures that as the website scales, modifications are manageable and consistent, thereby maintaining a professional appearance throughout the site.
1. Create the Navigation and Footer
Design the Navigation
Your navigation should be intuitive and clearly categorize the main sections of your site.
Use dropdowns sparingly to avoid clutter.
Develop the Footer
Include essential information like contact details, social media icons, and quick links.
This is also a great place for a brief about us summary or a call to action.
2. Set as Global Components
Global Symbols
In Webflow, you can create symbols for elements you'll use across multiple pages, like navigation bars and footers.
This ensures consistency and simplifies updates.
Create Symbols
To make a symbol, select your navigation or footer, then click 'Create Symbol' in the top navigation bar.
Give it a name, and use it across your site.
3. Configure Global Styles
Style Guide
Establish a style guide early on to maintain a consistent look and feel.
This should include your color scheme, typography, and any recurring design elements.
Set Basic Styles
In Webflow, use the 'Style Manager' to define and apply global styles for elements like body text and headings.
4. Set Typography, Colors, and Global Classes
Typography
Choose a primary and secondary font to enhance readability and brand identity.
Consider load times when selecting fonts, especially for web use.
Colors
Define a color palette that reflects your brand and is visually harmonious.
Apply these colors in the ‘Colors’ section of the style manager.
Global Classes
Create classes in Webflow for commonly used styles.
This can include buttons, titles, and paragraph styles, making it easy to keep styles consistent across your project.
If you want us to design, build or rebuild your website, please book a meeting and place your order now.
Step 3: Build the Main Pages
Building the main pages of your website involves a detailed and strategic approach to ensure that each page not only looks great but also fulfills its functional purpose effectively. This step is crucial because these pages often serve as the primary interaction points for your visitors. The design and content need to engage users immediately, provide valuable information, and encourage them to explore further or take action. This phase focuses on creating a compelling user experience by crafting intuitive layouts, informative content, and visually appealing designs that resonate with your target audience. Utilizing Webflow's powerful design and interaction tools, you can create pages that not only look professional but are also optimized for usability and conversion.
1. Design the Above the Fold Area
Capture Attention
This is the first section your visitors see without scrolling. It should include a powerful headline, an eye-catching image or video, and a clear call-to-action (CTA).
Immediate Value Proposition
Quickly convey what your site or business offers and why it matters to your visitors.
Navigation Links
Ensure the main navigation menu is visible and accessible, providing clear pathways to other important sections.
2. Design Below the Fold Content
Detailed Information
Expand on your introductory offers, services, or products. Use this space to provide more detailed information that supports your initial claims or offers.
Engagement Elements
Incorporate elements such as testimonials, case studies, or feature highlights to build trust and credibility.
Secondary Calls to Action
Encourage deeper engagement or conversion with secondary CTAs like newsletter sign-ups, contact forms, or links to recent blog posts.
3. Build the About Us Page
Tell Your Story
Share the history, mission, and values of your company. This is a chance to connect emotionally with your audience.
Team Profiles
Introduce key team members with photos and brief bios to humanize your brand.
Vision and Goals
Highlight your business goals and what sets you apart from the competition.
4. Design the Contact Page
Essential Information
Include all necessary contact details like phone numbers, email addresses, and physical location (if applicable).
Contact Form
Add a simple and direct form for inquiries that links directly to your business email.
Map Integration
Embed a Google Map to show your location if you have a physical store or office.
If you want us to design, build or rebuild your website, please book a meeting and place your order now.
Step 4: Develop Dynamic Content Pages
Dynamic content pages are essential for websites that require regular content updates, such as blogs, news sites, portfolios, or e-commerce platforms. These pages leverage Webflow’s CMS (Content Management System) capabilities, enabling you to manage and publish content efficiently without needing to modify the site’s static structure each time. This approach not only makes the website more interactive and engaging but also significantly enhances its scalability and flexibility. By automating the content update process, you ensure that your site remains relevant, fresh, and SEO-friendly. Setting up CMS-driven pages allows for better content organization, easier updates, and improved user engagement, making it an indispensable step in modern web design.
1. Build a CMS Archive Page (Blog Page)
Structure Your Content
Design a layout that can dynamically display a list of articles or blog posts. Include elements like titles, excerpts, author names, and publication dates.
Filtering and Sorting
Implement filtering options to allow visitors to sort the content based on categories, tags, or dates.
Pagination
Set up pagination to organize content into manageable chunks, improving load times and user navigation.
2. Build a CMS Collection Page (Blog Template Page)
Template Design
Create a template that automatically populates with content from your CMS. This page should include the article title, main image, and body text.
Rich Text Elements
Utilize Webflow’s rich text field to allow for different content formats, including headers, lists, quotes, and media within articles.
Related Content and Navigation
Add links to related posts or next and previous articles to encourage further reading and exploration.
3. Create Additional CMS Structures
Diverse Content Types
Beyond blogs, consider setting up CMS for other content types like case studies, testimonials, or product listings, which require regular updates.
Custom Categories
Design custom categories and fields that are specific to the type of content you are managing. For instance, product pages may include price, dimensions, product images, and descriptions.
User Submissions
If applicable, incorporate forms that allow users to contribute content, such as user reviews or comments, directly feeding into the CMS.
By integrating CMS into your Webflow project, you not only streamline content management processes but also empower non-technical team members to update and publish new content independently. This step ensures that your website can grow and evolve with your audience’s needs without requiring constant developer intervention.
If you want us to design, build or rebuild your website, please book a meeting and place your order now.
Step 5: Advanced Interactions and Animations
Integrating advanced interactions and animations into your Webflow website can transform a static site into a dynamic, engaging user experience. These elements are pivotal in capturing user attention, conveying information in an impactful way, and enhancing the overall aesthetic appeal. Webflow’s robust platform allows designers to create sophisticated visual effects without writing complex code, making it accessible even for those with minimal programming expertise. By utilizing Webflow's interactions and animations, you can guide users through the narrative of your site, emphasize key content, and create memorable interactions that encourage users to stay longer and explore deeper.
1. Add Scroll Animations
Trigger-Based Animations
Set up animations that activate as users scroll through content. Use Webflow's trigger options like scroll into view, scroll out of view, and page load to initiate animations.
Progressive Reveal
Design elements to appear progressively as the user scrolls down the page. This can include fading in, moving into position, or scaling up, which helps keep the user's attention focused on the content.
Parallax Scrolling
Create a sense of depth by having background and foreground content move at different speeds during scrolling, adding a layer of sophistication to your site’s design.
2. Implement Hover Effects
Button Enhancements
Customize buttons with hover effects such as color changes, underlines, or shadows to provide immediate visual feedback to the user.
Image Transformations
Apply scale, rotate, or filter effects to images on hover to make galleries or product images more interactive and visually engaging.
Text Highlights
Use hover effects to change the color or background of text links and headings, indicating interactivity and enhancing readability.
3. Create Page Load Animations
Initial Impressions
Design animations that play when a user first arrives on a page, such as elements sliding into place or key text growing in size. This sets the tone and grabs attention right from the beginning.
Loading Sequences
If your site has heavy content, incorporate loading animations or progress bars that entertain or inform users while they wait, improving the perceived loading time.
Staggered Animations
Introduce elements sequentially rather than all at once to guide the user's eye through the content methodically, enhancing the storytelling aspect of your site.
4. Add Micro-interactions
Feedback on User Actions
Design small animations for buttons, forms, and toggles that react to user interactions, providing feedback and enhancing the tactile feel of the website.
Animated Icons
Incorporate subtle movements into icons for social media links, menu toggles, or call-to-action prompts to make the interface feel alive and responsive.
By carefully crafting these animations and interactions, you create a website that not only looks professional but also provides an intuitive and delightful user experience. These enhancements make your site not just a source of information but a compelling digital journey that reflects the quality and care of your brand.
If you want us to design, build or rebuild your website, please book a meeting and place your order now.
Step 6: Optimize and Integrate
Optimizing and integrating key functionalities into your Webflow website is crucial for ensuring its effectiveness and enhancing its capabilities. This step involves implementing SEO best practices, integrating social media platforms, and adding email marketing functionalities, all of which are essential for expanding your site's reach and improving user engagement. Optimization ensures that your site is discoverable and ranks well in search engine results, while integration facilitates better communication channels between your brand and your audience. Through these enhancements, your website not only attracts more visitors but also delivers a richer, more connected experience.
1. SEO Optimization
Meta Titles and Descriptions
Craft unique and descriptive meta titles and meta descriptions for each page to improve visibility in search engine results.
Keyword Optimization
Integrate relevant keywords naturally into your content, headers, and meta tags to boost SEO performance.
Image Alt Texts
Ensure all images on the site have descriptive alt texts, which improve accessibility and SEO.
Mobile Optimization
Guarantee that your website is fully responsive and mobile-friendly, as mobile usability is a significant factor in Google rankings.
Loading Speed
Minimize load times by optimizing image sizes and utilizing Webflow’s site performance tools to keep your website fast and efficient.
2. Social Media Integration
Sharing Buttons
Add social media sharing buttons to blog posts, product pages, and other key content to increase visibility and drive traffic from social platforms.
Social Feeds
Embed live social media feeds, such as Twitter or Instagram, to keep your site content fresh and encourage social follows.
Social Login
Implement social login options for user accounts or comments to simplify the login process and collect user data effectively.
3. Email Marketing Integration
Newsletter Signup Forms
Embed email subscription forms prominently across your site to build your mailing list and stay in contact with your audience.
Automated Emails
Set up automated welcome emails, confirmations, and promotional campaigns through integration with email marketing platforms like Mailchimp or Campaign Monitor.
Personalization and Segmentation
Utilize tools to segment your audience and personalize emails based on user behavior and preferences, increasing the effectiveness of your communications.
By carefully optimizing and integrating these elements, your Webflow site becomes not only a standalone digital presence but a dynamic hub that interacts continuously with your audience. These steps are vital for building a robust online platform that supports sustained growth and active engagement.
If you want us to design, build or rebuild your website, please book a meeting and place your order now.
Step 7: Testing and Review
Testing and reviewing your Webflow website are critical final steps before launching. This phase ensures that the site functions as expected across various devices and browsers, offers a flawless user experience, and is free from bugs or errors that could detract from its performance. Comprehensive testing helps identify and address potential issues that might not have been apparent during the design and development stages. Reviewing the site thoroughly also ensures that it aligns with the project goals and adheres to web standards, ultimately leading to a more reliable and professional online presence.
1. Cross-Browser and Device Testing
Compatibility Checks
Test your website on multiple browsers (like Chrome, Firefox, Safari, and Edge) to ensure that it looks and behaves consistently.
Responsive Testing
Use Webflow’s preview and testing tools to see how your site appears on different devices, including tablets and smartphones, adjusting layouts and elements as necessary.
2. User Experience Testing
Navigation Review
Ensure that all navigation elements are intuitive and functional, allowing users to easily find what they need.
Interactive Elements Test
Verify that all forms, buttons, and other interactive elements operate smoothly, with appropriate feedback provided to users.
Accessibility Audit
Check that your website is accessible to all users, including those with disabilities. This includes testing color contrasts, keyboard navigability, and screen reader compatibility.
3. Functionality Checks
Load Performance
Evaluate the loading times of your site, optimizing resources like images and scripts to enhance speed.
Link Validation
Scan the website for broken links and ensure that all internal and external links are working as intended.
SEO Review
Perform an SEO audit to check that all pages are optimized for search engines, including proper use of tags, sitemaps, and structured data.
4. Content and Compliance Review
Proofreading Content
Double-check all textual content for errors in grammar, punctuation, and clarity to maintain professionalism.
Legal Compliance
Ensure your site complies with relevant laws and regulations, such as GDPR for privacy policies and cookies if applicable.
5. Feedback Collection
Internal Reviews
Gather feedback from your team or stakeholders to gain different perspectives on the site’s design and functionality.
Beta Testing
If possible, allow a group of external users to test the site in a controlled environment to gather additional insights into user experience and satisfaction.
By methodically working through these testing and review processes, you ensure that your Webflow site is robust, professional, and ready for launch. This meticulous attention to detail will help prevent issues post-launch and provide a seamless experience for all users from day one.
If you want us to design, build or rebuild your website, please book a meeting and place your order now.
Step 8: Publish and Go Live
Publishing and going live with your Webflow website is the culmination of your hard work and planning. This critical step involves making your site accessible to the public, but it's more than just clicking a button. Proper preparation ensures that the transition from a development environment to a live setting is smooth, minimizing potential disruptions and maximizing site performance from the outset. The process also includes crucial tasks like connecting to a custom domain, optimizing for search engines, and implementing tracking to monitor site performance. By carefully managing this phase, you solidify the foundation for your website's success in the real world.
1. Domain Connection
Custom Domain Setup
Purchase a custom domain from a registrar if you haven't already. This enhances your brand’s professional image.
Connect Domain to Webflow
In your Webflow dashboard, navigate to the hosting settings to connect your domain. Follow the instructions to update DNS settings at your domain registrar, which typically involves pointing your domain to Webflow’s servers.
SSL Configuration
Enable SSL in Webflow to secure your website with HTTPS, providing an additional layer of security for your users and improving SEO.
2. Final Publish
Site Optimization
Before going live, ensure all images, scripts, and CSS are fully optimized to reduce load times.
Final Content Check
Do a final sweep of the content for any errors, outdated information, or placeholder text that needs to be updated.
Preview and Test
Use Webflow's publishing tools to preview your site on the actual domain, ensuring everything looks and functions as expected.
3. Search Engine Optimization
Submit Sitemaps
Generate and submit sitemaps to search engines like Google via their respective webmaster tools to help improve your site’s discoverability.
SEO Check
Ensure that all SEO best practices have been implemented, including meta tags, alt tags, and structured data.
4. Performance Monitoring
Analytics Setup
Integrate tools such as Google Analytics to track visitor behavior, traffic sources, and engagement metrics. This data is vital for measuring the site’s performance and making informed decisions moving forward.
Uptime Monitoring
Consider setting up uptime monitoring to receive alerts if your site goes down. This allows for quick resolution of any issues that may arise.
5. Marketing and Announcement
Launch Announcement
Plan a marketing strategy for announcing the launch of your new site. This might include email newsletters, social media posts, and press releases.
Feedback Collection
After launch, gather user feedback which can be invaluable for further refining and improving the website.
Publishing your website is an exciting moment that marks the beginning of its life cycle. By following these detailed steps, you can ensure that your site not only goes live smoothly but also has the best chance for success in the competitive digital landscape.
If you want us to design, build or rebuild your website, please book a meeting and place your order now.
Step 9: Maintenance and Updates
Launching your website is a significant achievement, but the work doesn’t stop there. Regular maintenance and updates are crucial to keep the site secure, functional, and relevant. This ongoing process ensures that your website adapts to new technologies, complies with updated web standards, and meets evolving user expectations. Maintenance involves fixing bugs, updating content, and adding new features, while updates might include implementing new design trends and enhancing existing functionalities. Properly managing these tasks is essential for maintaining the performance, security, and user experience of your website over time.
1. Regular Content Updates
Fresh Content
Regularly update the site with new blog posts, news, products, and images to keep your content fresh and engaging for return visitors.
Content Review
Periodically review and revise existing content to ensure accuracy, relevance, and engagement. This includes checking for broken links or outdated information.
2. Performance Monitoring
Site Speed Checks
Continuously monitor your website’s loading speeds and optimize elements as necessary to ensure fast performance.
SEO Monitoring
Regularly review SEO performance and update strategies according to the latest search engine algorithms and best practices.
3. Security Updates
Software Updates
Regularly update Webflow and any third-party integrations to their latest versions to protect against vulnerabilities.
Regular Backups
Ensure that your website data is backed up regularly. This protects your site in case of data loss or corruption.
4. Functionality and Bug Fixes
Bug Reporting System
Implement a system for users to report issues. Regularly check and fix reported bugs to maintain site functionality.
User Testing
Periodically perform user testing to uncover usability issues that may not have been initially apparent.
5. New Features and Design Updates
Implement New Features
Based on user feedback and new requirements, periodically add new features that enhance site functionality or user experience.
Design Refreshes
Keep the website’s design modern and in line with current trends by implementing design updates, which can include revising layouts, updating color schemes, and enhancing visual elements.
6. User Feedback and Analytics
Collect User Feedback
Regularly solicit feedback from users to understand their needs and experiences. Use surveys, feedback forms, and usability tests.
Analyze User Data
Use analytics to track user behavior, which can provide insights into needed improvements or new features.
7. Compliance and Legal Updates
Stay Informed
Keep abreast of new laws and regulations that might affect your website, such as privacy policies or accessibility standards.
Update Compliance Documents
Regularly review and update legal documents such as privacy policies and terms of service to ensure they remain compliant with current laws.
By diligently following these maintenance and update procedures, you ensure that your Webflow site remains secure, efficient, and aligned with your audience's needs. This commitment to upkeep not only enhances user satisfaction but also supports your long-term online success.
If you want us to design, build or rebuild your website, please book a meeting and place your order now.
Building a website with Webflow is an exciting journey that blends creativity with technology. By following the steps outlined in this guide, you've learned how to set up, design, optimize, and maintain your website effectively. Remember, a website is never truly finished; it evolves with your needs and those of your audience. Regular updates and maintenance are crucial to keep it secure, relevant, and engaging. With Webflow, you have a robust platform at your fingertips to keep adapting and enhancing your digital presence. Embrace the continuous improvement process, and watch your website grow and succeed in the ever-changing digital landscape.
Share your thoughts! Write a comment: